Firstly you need to see the before shot, and remember that the floor was all scuffed up and stained, and the yucky wallpaper was a flowery beige crime, and the walls an icky magnolia with loads of pit holes. Other that that it was in pretty good nick, and definitely the best room in the house when we moved in.
Above: icky wallpaper and scuffed up floor :(
Day 1: Firstly, we filled, sanded and prepared the 3 painted walls (there were a lot of cracks to fill), and painted over the manky wallpaper with F&B Downpipe No 26, then we painted over the 3 remaining, tear inducing, magnolia walls with a crisp brilliant white - what a breath of fresh air! Day 2: We sanded the oak floors - they only needed a fine 120 grade sanding (as they weren't that bad really), we coated them with Danish oil, and left them to dry.
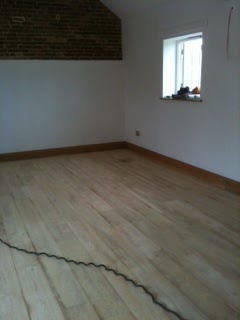
Above: During - bedroom floor - part way through - sanded but not oiled but already looking great!
Above: After - the lovely oak flooring oiled with natural Danish oil :)
Day 3: (Easter Sunday): Spend the day painting the window frames (F&B Lamp Room Grey), and then moved on to the wooden furniture - (see my updating pine furniture post here).
You need to know at this stage that the bedroom furniture was a mixmatch of all colours of pine, from the untreated bare kind to the orangey shiny kind - not a great look for a restful, coordinated and fabulous bedroom see below:
Above: Before -yucky shiny orangey pine drawers - blurgh.
Now I know you probably want to see the 'after', the 'before' and 'during' is a bit of an anti-climax, but I am not quite ready yet, just a few more finishing touches and then I'll post them - promise! :)


what a gorgeous "blank slate" to work with! i have beam envy!
ReplyDelete